Last week I wrote a walk through explaining how to use OpenPGP to encrypt your e-mail on OS X. Today I’m going to write a walk through explaining how to install GNU Privacy Guard in Windows. GNU Privacy Guard is a collection of OpenPGP tools. GPGTools, which was covered in last week’s OS X tutorial, is actually built on GNU Privacy Guard. After installing GNU Privacy Guard in Windows you will be able to generate OpenPGP key pairs, import public OpenPGP keys, and encrypt and decrypt messages using OpenPGP. Furthermore, installing GNU Privacy Guard is needed for sending and receiving OpenPGP encrypted e-mails, which will be covered in a future tutorial.
The first thing you need to do is download Gpg4win from here. As of this writing version 2.1.1 is the latest and the version used to create this guide. Previous versions of Gpg4win may not work with this guide.
Now that you have Gpg4win downloaded it’s time to begin installing it. Installing Gpg4win is pretty straight forward. Just click the Next button five times and the Install button. After clicking the Install button you’ll get a progress bar informing you of what packages are being installed. Once everything is installed click the Next button again. Now you’ll be informed that Gpg4win needs a list of root certificates. Check the box labeled Root certificates defined or skip configuration and click the Next button again followed by the Finish button. Gpg4win is now installed.
Now you will need to generate your key pair. There are two ways you can do this. The first method is using Kleopatra, a graphical interface installed with the Gpg4win package and the second method is to use the command line tools. I will walk you through using the command line tools because Kleopatra only allows you to generate 3072 bit keys while the command line allows you to generate 4096 bit keys. Don’t worry, using the command line isn’t hard.
To create your key pair open the Command Prompt and issue the following command:
gpg --gen-key
You should get the following output:
gpg (GnuPG) 2.0.20; Copyright (C) 2013 Free Software Foundation, Inc.

This is free software: you are free to change and redistribute it.

There is NO WARRANTY, to the extent permitted by law.
Please select what kind of key you want:
(1) RSA and RSA (default)
(2) DSA and Elgamal
(3) DSA (sign only)
(4) RSA (sign only)
Your selection?
Since you will want the ability to sign and encrypt e-mails using OpenPGP select 1. Now you will be asked to enter a key length:
RSA keys may be between 1024 and 4096 bits long.

What keysize do you want? (2048)
Type 4096 and hit enter. You will now be asked to enter an expiration date:
Requested keysize is 4096 bits
Please specify how long the key should be valid.
0 = key does not expire
Key is valid for? (0)
I tend not to set expiration dates for OpenPGP keys because issuing new keys periodically is an inconvenience for the people I e-mail regularly. When you want your key pair to expire or not is entirely up to you so enter whatever you want. If you go with the default (no expiration date) you will be asked to verify that you don’t want to key pair to expire:
Key does not expire at all

Is this correct? (y/N)
Enter y if you don’t want an expiration date and N if you’ve changed your mind. It’s now time to enter your personal information. For this example I will enter my name in the Real name field, openpgptest@christopherburg.com in the Email address field, and leave the Comment field blank:
GnuPG needs to construct a user ID to identify your key.
Real name: Christopher Burg
Email address: openpgptest@christopherburg.com
Comment:
You will not be given one more chance to change things:
You selected this USER-ID:
"Christopher Burg
Change (N)ame, (C)omment, (E)mail or (O)kay/(Q)uit?
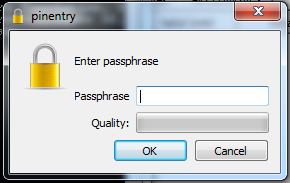
Selecting O will result in a dialog box appearing asking you to enter a passphrase. This passphrase will be used to encrypt your private key. Whenever you want to use your private key you’ll need to enter your passphrase first in order to decrypt it:
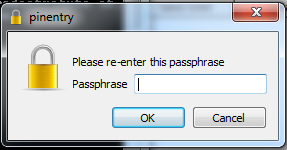
Enter a strong passphrase[1] and click enter, which will result in you being asked to re-enter the passphrase:
That’s it, you now have an OpenPGP key pair that can be used to sign and encrypt e-mails. I will cover sending encrypted e-mails in a future tutorial because the method I use in Windows, Thunderbird with Enigmail, is the same method I use in Linux. Therefore, to make less work for myself, I will first write a tutorial explaining how to install GNU Privacy Guard in Linux before writing a tutorial on using Thunderbird and Enigmail.
[1] For example, the passphrase “passphrase” is very poor. It’s not only short, but it’s also easily guessed and commonly found in dictionary files. The passphrase “This is a random phrase that says nothing but probably isn’t easily guessed nor commonly found in most dictionary files.” is notably better since it’s not easily guessable or a commonly used phrase (although, now that it’s publicly published to the Internet, it’s worthless so don’t use it). Mixing in numbers and special characters will improve the passphrase even more.
Edit: 2013-06-13: 22:26: Corrected the command –key-get to be –gen-key. Thanks Luca for pointing it out.
i wrote this to help people with key generation:
https://github.com/attila-lendvai/gpg-keygen
Hello and thank you for the very useful infos. Maybe there is a typo:
shouldn’t be
gpg –gen-key
instead of
gpg –key-gen?
cheers
You are correct. I’ve made the correction. My thanks for catching that and letting me know.
I only have gpg2 on my recent installation of gpg4win.
GPG2 is the newer version of GPG so you’re good to go.